











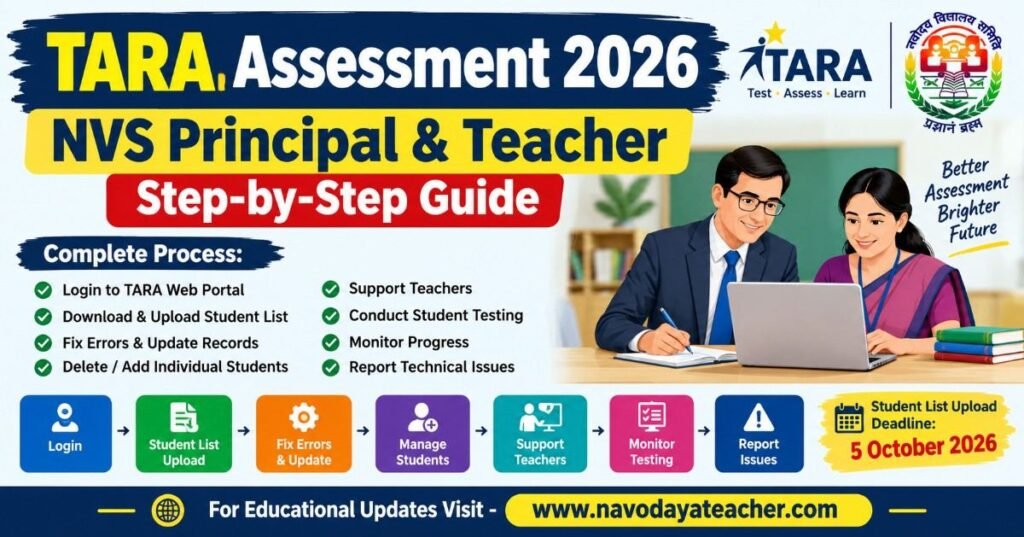
In this article we providing information regarding TARA Assessment 2026 guide for NVS schools: login, student upload, testing, monitoring, teacher support and technical issue reporting..
TARA Assessment 2026: NVS Principal & Teacher
The TARA training material for NVS School Principals provides instructions for logging into the TARA Web Portal, uploading the student list, correcting student information, supporting teachers during testing, monitoring the assessment process and reporting technical problems.
This guide explains the complete process in simple and practical language so that school Principals, Facilitators and teachers can easily complete their responsibilities.
What is TARA?
TARA is a web-based platform used for conducting student testing in schools.
For NVS schools, the Principal is required to use the TARA Web Portal for school-level activities such as:
- Login to the school account
- Uploading the student list
- Adding or deleting students
- Updating student information
- Monitoring students who have been tested
- Supporting teachers during the testing process
- Reporting technical issues
Important Website
TARA Web Portal:
www.taralit.com
The training material specifically instructs School Principals to use the website on a Laptop/Desktop and not install the TARA App for Principal login.
Step 1: Login to the TARA Web Portal
The first task for the School Principal is to log in to the TARA Web Portal.
Follow these steps:
Step 1: Open a Laptop/Desktop.
Step 2: Open the TARA website:
Step 3: Use the login credentials already created for the school.
Principal Login Format
The login email is based on the school’s UDISE/SHUDISE Code.
The format is:
SH + School UDISE Code + @nvs.gov.in
For example, if the school UDISE Code is:
24070610502
then the login ID will be:
Password
The training material states that the School Principal’s 10-digit mobile number is used as the password.
Important
Do not use the Principal’s personal email ID for login.
The presentation also provides a school-wise list of Principal login email details for reference.
Principal Should Use the Website, Not the TARA App
One important instruction for School Principals is:
Principals are not supposed to install the TARA App.
The Principal should use the TARA Web Portal through a Laptop/Desktop.
Step 2: Update the Student List
After successfully logging in, the next important task is to upload the student list.
Students Covered
The training material instructs schools to download the student list for:
- Class VI
- Class VII
- Class VIII
from the UDISE portal.
How to Upload the Student List
Follow these steps:
Step 1
Download the required student list from the UDISE portal.
Step 2
Open the TARA Web Portal.
Step 3
Go to:
Student List Upload
Step 4
Upload the required Excel sheet/list.
Step 5
Check the system response.
If there are errors, correct the Excel sheet and upload it again.
The process is complete only when the portal displays:
“Upload Success”
The training material specifically instructs schools to fix errors until the successful upload message is received.
Common Errors While Uploading Student List
The training material identifies some common reasons for upload errors.
Error 1: Incorrect Class/Section
Students may be added to a section that does not exist in the school.
Example
Suppose the school has only:
Class VI-A
but the uploaded sheet contains students from:
Class VI-B
This can create an error.
Solution
Check the class and section information in the Excel sheet and remove/correct the incorrect entries before uploading again.
Error 2: Student Already Exists in Another School
A student may already be present in the TARA system under another school.
Solution
Remove that student from the Excel sheet and upload the corrected list again.
Step 3: Deleting the Student List
During the Student Addition Phase, there may be situations where the entire uploaded student list needs to be deleted.
The training material provides the following process.
Step 1
Click:
Students
from the Navigation Bar.
Then select:
Delete All Entries
Step 2
Read the instructions carefully.
Then click:
Yes, Delete
Step 3
Check whether the portal displays:
“Deletion Successful”
Only after receiving the successful deletion message should you proceed with the next activity.
How to Add New Students in a TC Case
If a student leaves the school because of a Transfer Certificate (T.C.) case, the student list may need to be updated.
The procedure depends on the phase.
During Student Addition Phase
- Delete the existing student list.
- Add the new student’s details to the Excel sheet.
- Upload the Excel sheet again.
During Testing Phase
- Add the new student’s details to the sheet.
- Upload the Excel sheet.
These instructions are provided in the TARA training material.
How to Delete an Individual Student
If only one particular student’s record needs to be removed, there is no need to delete the entire list.
Follow these steps:
- Click Students.
- Find the student’s name.
- Click the three dots next to the student’s name.
- Select Delete Student.
- Confirm the deletion.
This allows the school to remove an individual student record instead of deleting the complete list.
How to Edit Student Details
If a student’s information has been entered incorrectly, the record can be updated.
Follow these steps:
- Click Students.
- Find the student’s name.
- Click the three dots next to the student’s name.
- Select Edit Details.
- Make the required changes.
According to the training material, the editable details include:
- Student Name
- Roll Number
- Gender
Step 4: Support Teachers During TARA Testing
After the student list has been successfully uploaded, the focus shifts to supporting teachers during the testing process.
The training material identifies this stage as:
Support for Teachers & Monitoring
The activity is scheduled from:
6 October 2026 – Dussehra Break
What Should the Principal Do for Teachers?
The Principal should ensure that teachers have:
- Required resources
- Adequate time
- Proper instructions
- Support for conducting the test
- Necessary technical assistance
The training material states that each English/Hindi test takes less than 2 minutes per student.
Teacher’s Role During Testing
Teachers should conduct the student testing according to the prescribed procedure.
The Principal/School Facilitator should ensure that:
- Students included in the testing list are available.
- Teachers have the required resources.
- Testing is conducted according to the prescribed protocols.
- Students are tested in the appropriate language.
- The testing progress is monitored regularly.
The training material specifically emphasizes ensuring that the prescribed testing protocols are followed.
Step 5: Monitor Testing Progress
The Principal/Facilitator can monitor testing through the TARA Web Portal.
How to Monitor?
Open:
Then go to:
Facilitator
The Facilitator section allows the school to see the list of students who have been:
- Added
- Tested
The records are shown separately for:
- English
- Hindi
The training material specifically describes monitoring student testing through the Facilitator section.
Practical Monitoring Checklist for School
The Principal/Facilitator can regularly check:
Student List
☐ All required students are uploaded.
Student Information
☐ Student names are correct.
☐ Roll numbers are correct.
☐ Gender information is correct.
☐ Class and section information is correct.
Testing
☐ Teachers have received the required resources.
☐ Students are being tested.
☐ English testing is being completed where required.
☐ Hindi testing is being completed where required.
Monitoring
☐ Tested students are visible in the Facilitator section.
☐ Pending students are identified.
☐ Teachers are supported wherever required.
Important Points for NVS School Principals
Before starting the TARA process, keep these points in mind:
1. Use the Correct Website
Use:
2. Use School Login Credentials
Do not use a personal email ID.
3. Principal Login
Login format is based on:
SH + UDISE Code + @nvs.gov.in
4. Password
The training material specifies the Principal’s 10-digit mobile number.
5. Do Not Install the App for Principal Login
Principals should use the TARA website on a Laptop/Desktop.
6. Upload Student List Carefully
Check class, section and student information before uploading.
7. Check Upload Status
Continue correcting errors until “Upload Success” appears.
8. Monitor Regularly
Use the Facilitator section to monitor added and tested students.
9. Support Teachers
Ensure teachers have sufficient resources and time for testing.
10. Report Technical Problems
Use the Report Issue option or the designated Google Form.
Important Links
TARA Web Portal
TARA Training Video
The training material also provides a video link for the instructions:
Principal Login Details
The training material provides a school-wise Google Sheet containing the Principal login email details.
Thanks to Beloved Readers.
